How to use the PSD
An introduction to using the Product Safety Database (PSD) online digital service.
April 2025 – How product record main category and subcategory are selected has been changed
The PSD product subcategory for a product record will no longer be a free text field (which allows users to input any text they want) but will now be mapped to the Global Product Classification (GPC) secondary classification reference data (further information can be found here).
The product main category will still be aligned to the Safety Gate primary classification categories. Going forward products will be categorised as follows:
- Primary classification (PSD main product category) – Safety Gate
- Secondary classification (PSD product subcategory) – GPC
Users will now complete the following steps:
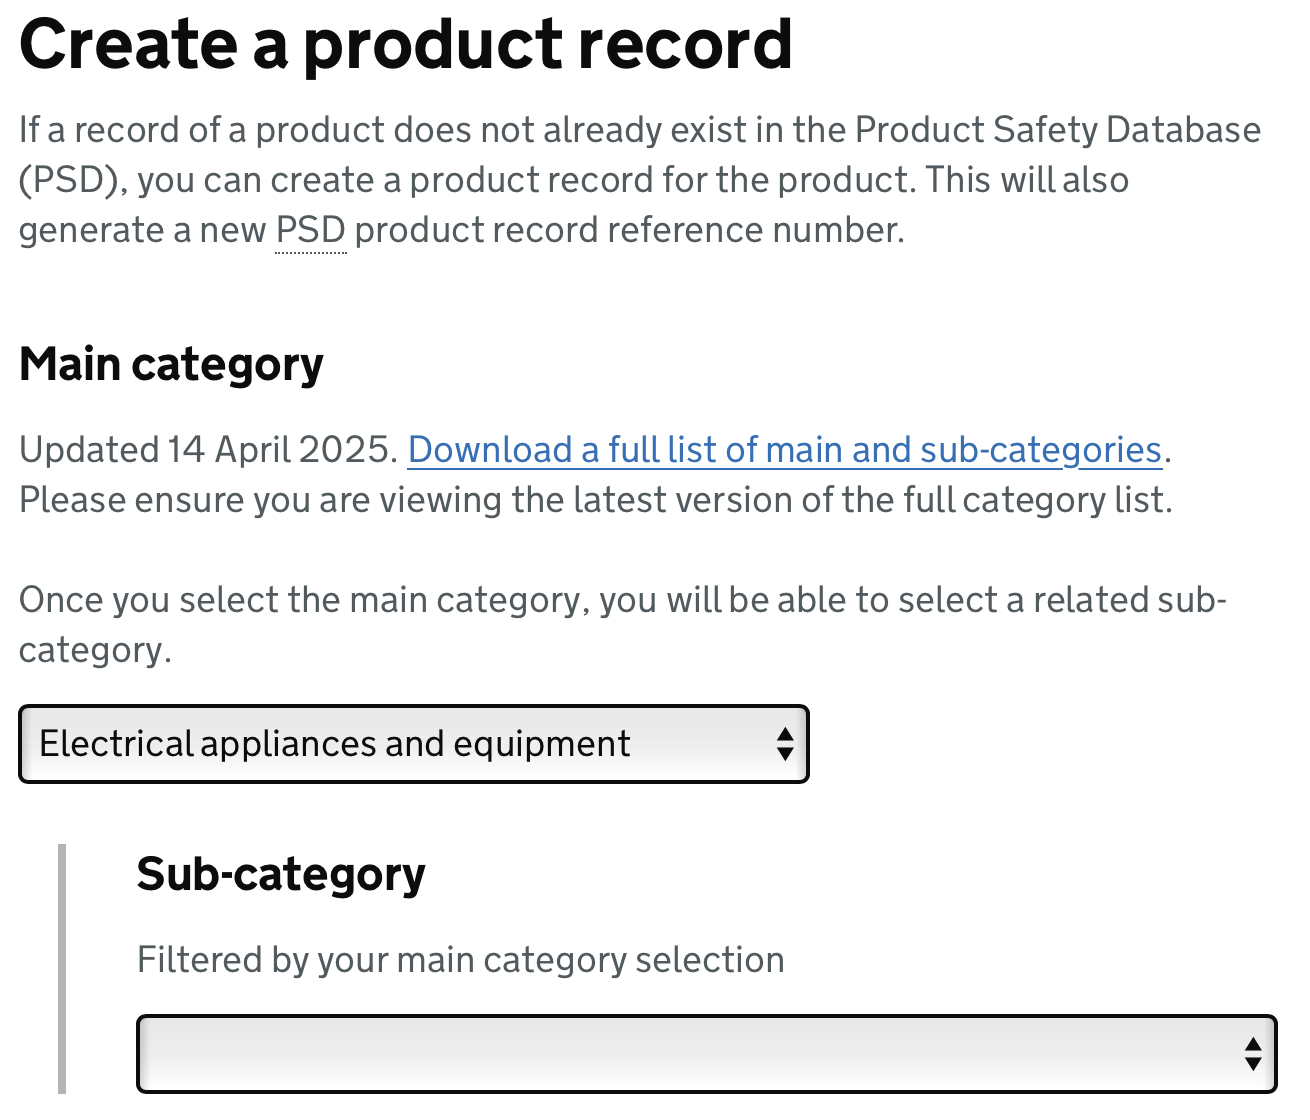
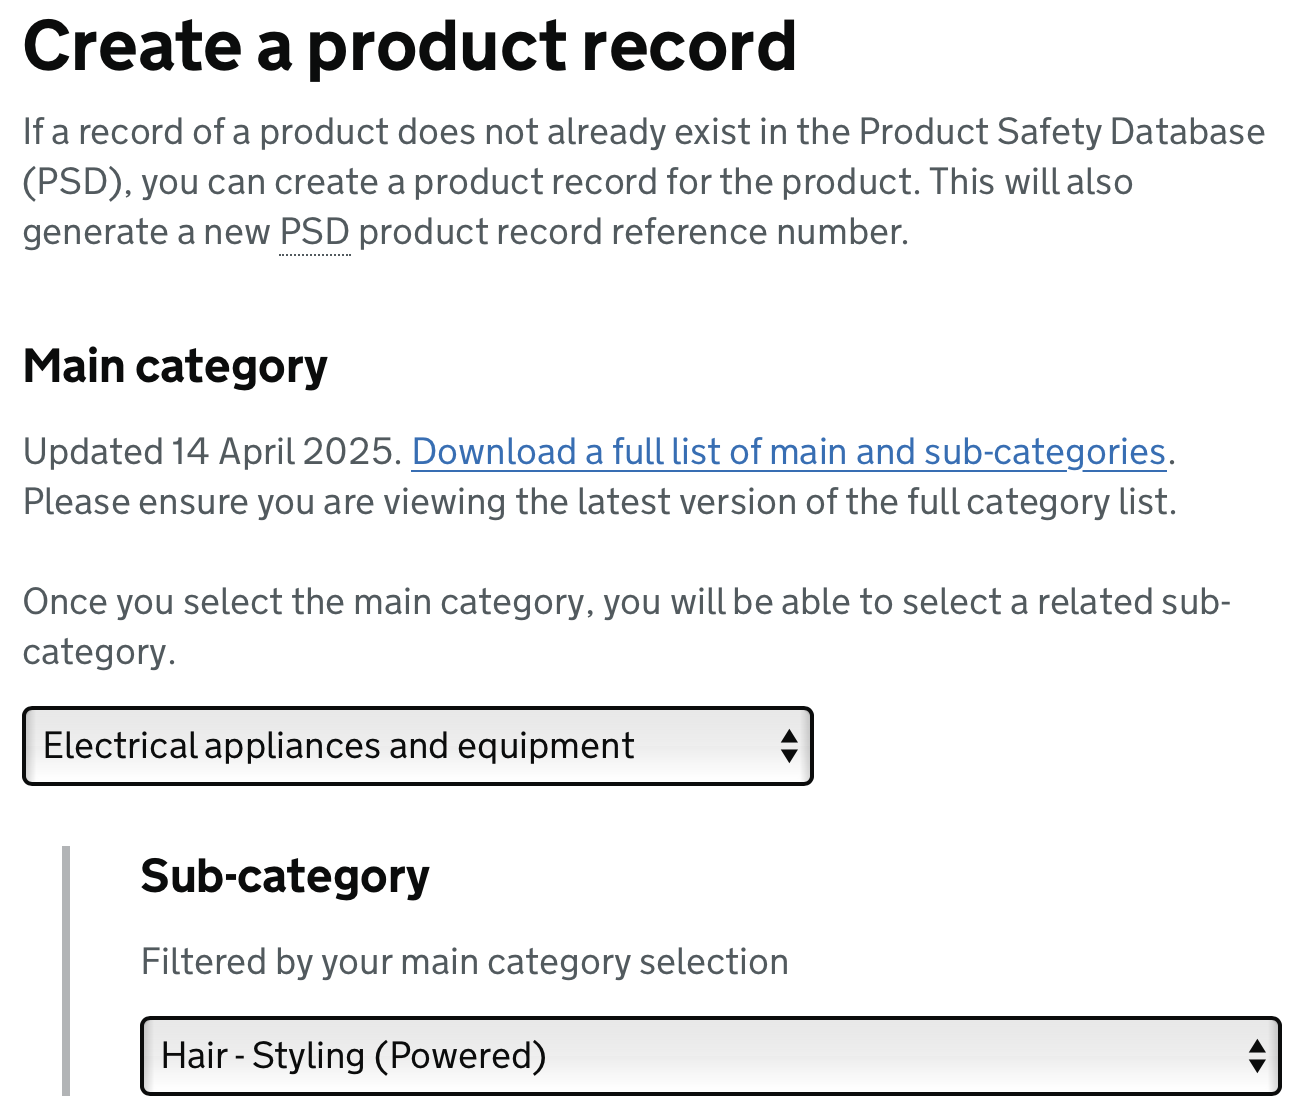
A breakdown of the new main categories and their associated subcategories is available here to download (you must be logged in to download).
Overview
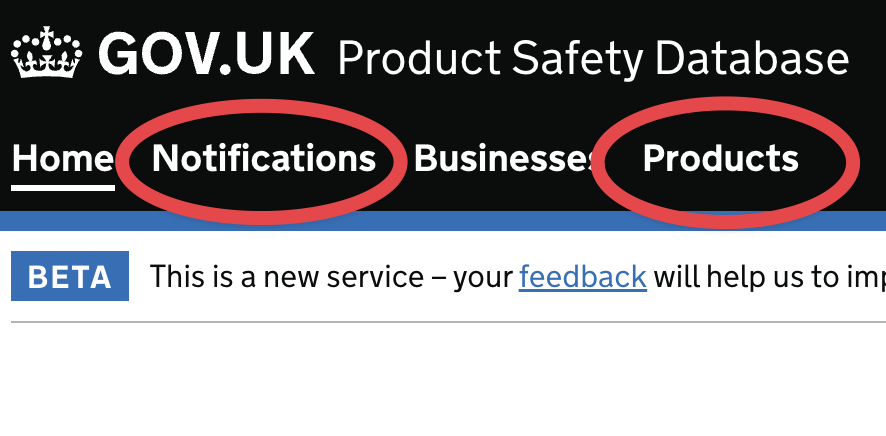
The two main areas within the PSD online service are the notifications area and the products area. These are accessed using the main navigation menu (towards the top/start of each page).
In the notifications area you can (i) create a new notification, (ii) find notifications you or your team have created or (iii) search the entire database of notifications. A notification is what ultimately reports unsafe, noncompliant and serious risk products to the OPSS and includes relevant information such as importer contact details, product batch numbers, test reports and corrective actions. Users can also report on products which have been tested or risk assessed and deemed safe and/or compliant.
When a notification is created, information and assets (such as accidents or incidents, reports and evidence images) can then be added directly to the notification. However, the basic information describing a product is added to a notification by including a product record which includes this information.
In the PSD a notification and a product record are two separate entities.
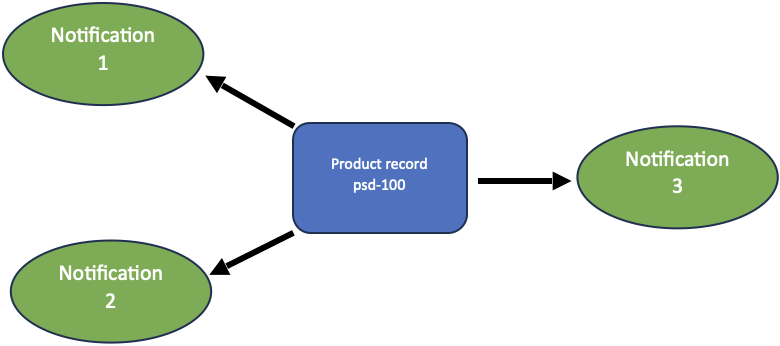
In the products area you can find the product records which are included in your notifications or search the entire database of product records. A product record only contains information about a product (such as its brand name, barcode, and its categorisation) and does not include notification information. A product record can be reused within many notifications and in notifications created by any team.
Your PSD account will assign you to a team. You can find information about your team in the 'Your team' page accessed via the main navigation menu.
2. Create a notification
The process of creating a notification can start from either a product record or from the notification area. A notification needs to include at least one product record.
To create a notification from a product record:
- In the products area, search for a product using the
'All products - Search' option* - Open a product record to view it
- Select the 'Add to a notification' option
- Complete the notification journey process
*If a product record describing the product does not already exist, you can create a new product record for the product.
To create a notification from the notification area:
-
In the notification area, select 'Create a new product safety notification'

When you create a notification, you and your team are the notification owners.
3. Find a notification
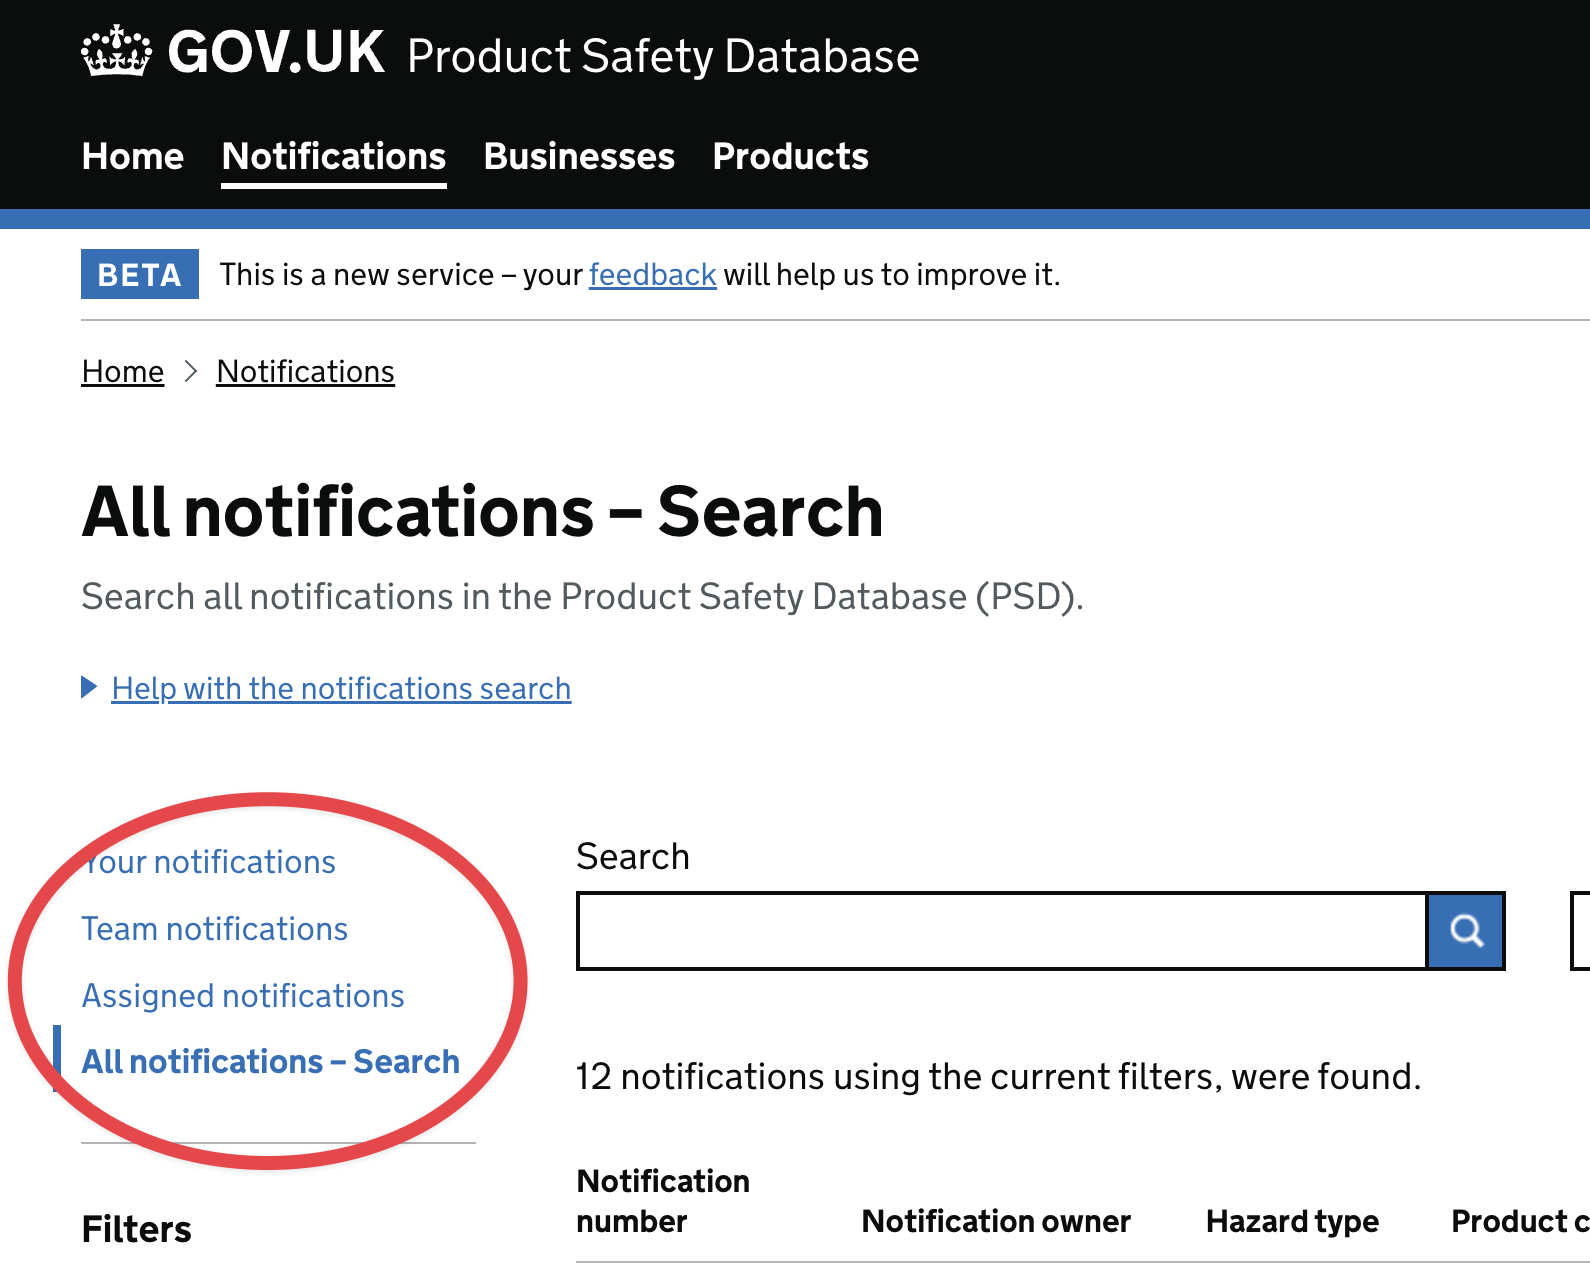
In the notifications area, the secondary navigation menu (on the left) provides three ways to find a notification:
- 'Your notifications' lists all your open notifications
- 'Team notifications' lists all your team's open notifications
- 'All notifications - Search' is where you can search all notifications in the PSD
You can apply filters to search results to reduce how many product records are found in a search.
Select a notification name in any list to open the main notification page for the notification.
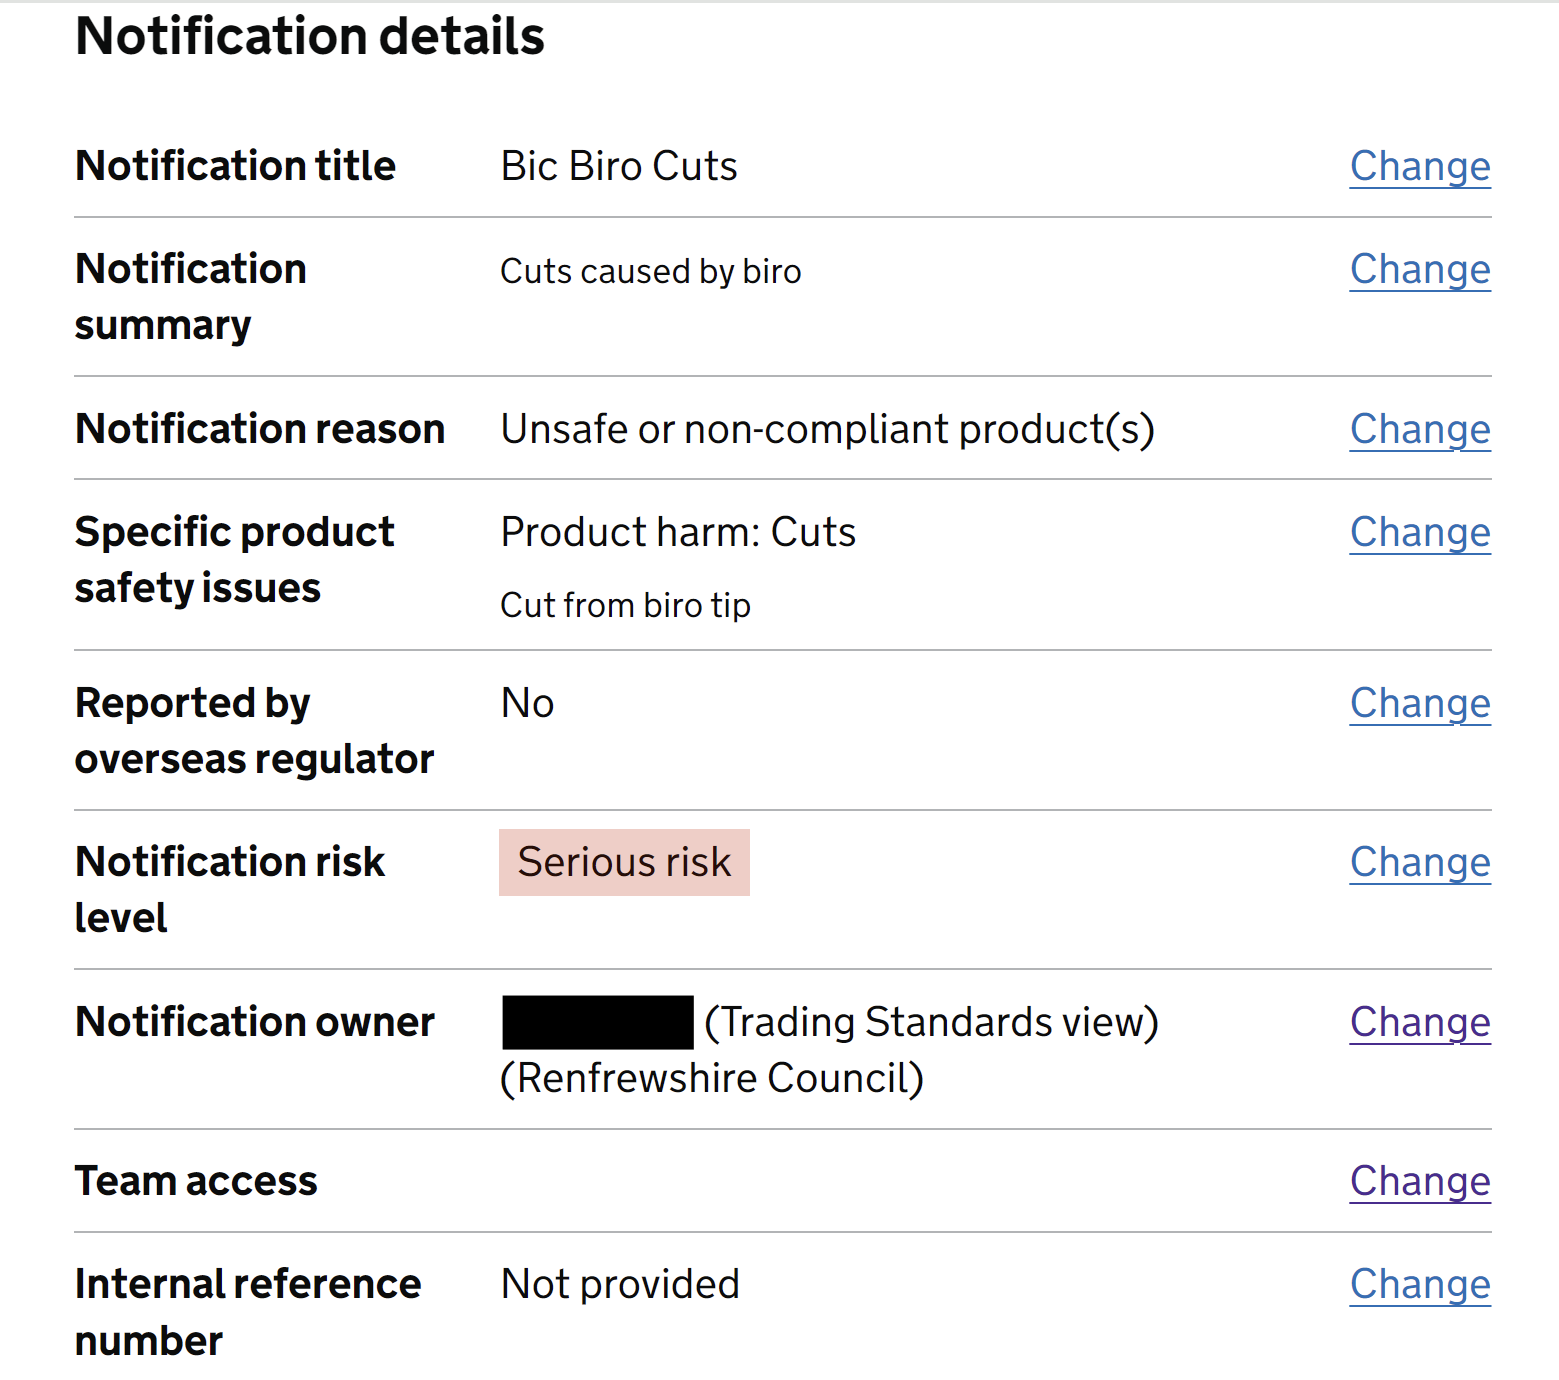
4. Viewing notification information
To view a notification, select it from the 'All notifications - Search' page. The notification information is listed in order of the notification task list: Notification details; Product identification details; Businesses and their roles in the supply chain; Evidence; Corrective actions.
5. Update a notification
If your team owns the notification or has been assigned to a notification, you can update a notification post-submission. By accessing a notification from 'Your notifications', 'Team notifications' or 'Assigned notifications', the notification summary page provides 'add' or 'change' options throughout allowing you to update a submitted notification.
You cannot update a notification if you do not have editing permission for the notification.
On the main notification page for an individual notification, the team which owns the notification can add other teams to the notification and grant them editing permission. (Select 'Change' in the 'Teams added' row).
The team which owns the notification can add other teams to the notification and grant them editing permission the 'Teams access' field.
6. Adding the OPSS Incident Management Team to a notification
The OPSS Incident Management Team (IMT) will be automatically added to a notification, if:
- the product poses a high or serious risk
- the product has been recalled
- you need to notify overseas regulators
7. Create a product record
A product record is what records the basic information about a product, such as its brand name, its model name, and its barcode. At least one product record should be included within a notification (to represent the product). The same product record can be reused and included within many different notifications.
Creating a product record is not the same as creating a notification.
Before you create a new product record you should first check that a product record representing the product does not already exist within the Product Safety Database (PSD). You should avoid creating duplicates.
A counterfeit product and the real product should be represented by two different product records.
To create a product record:
- In the products area, select the 'Create a new product record' option on the 'Your products', 'Team products' or 'All products - Search' page
- Complete the form journey process
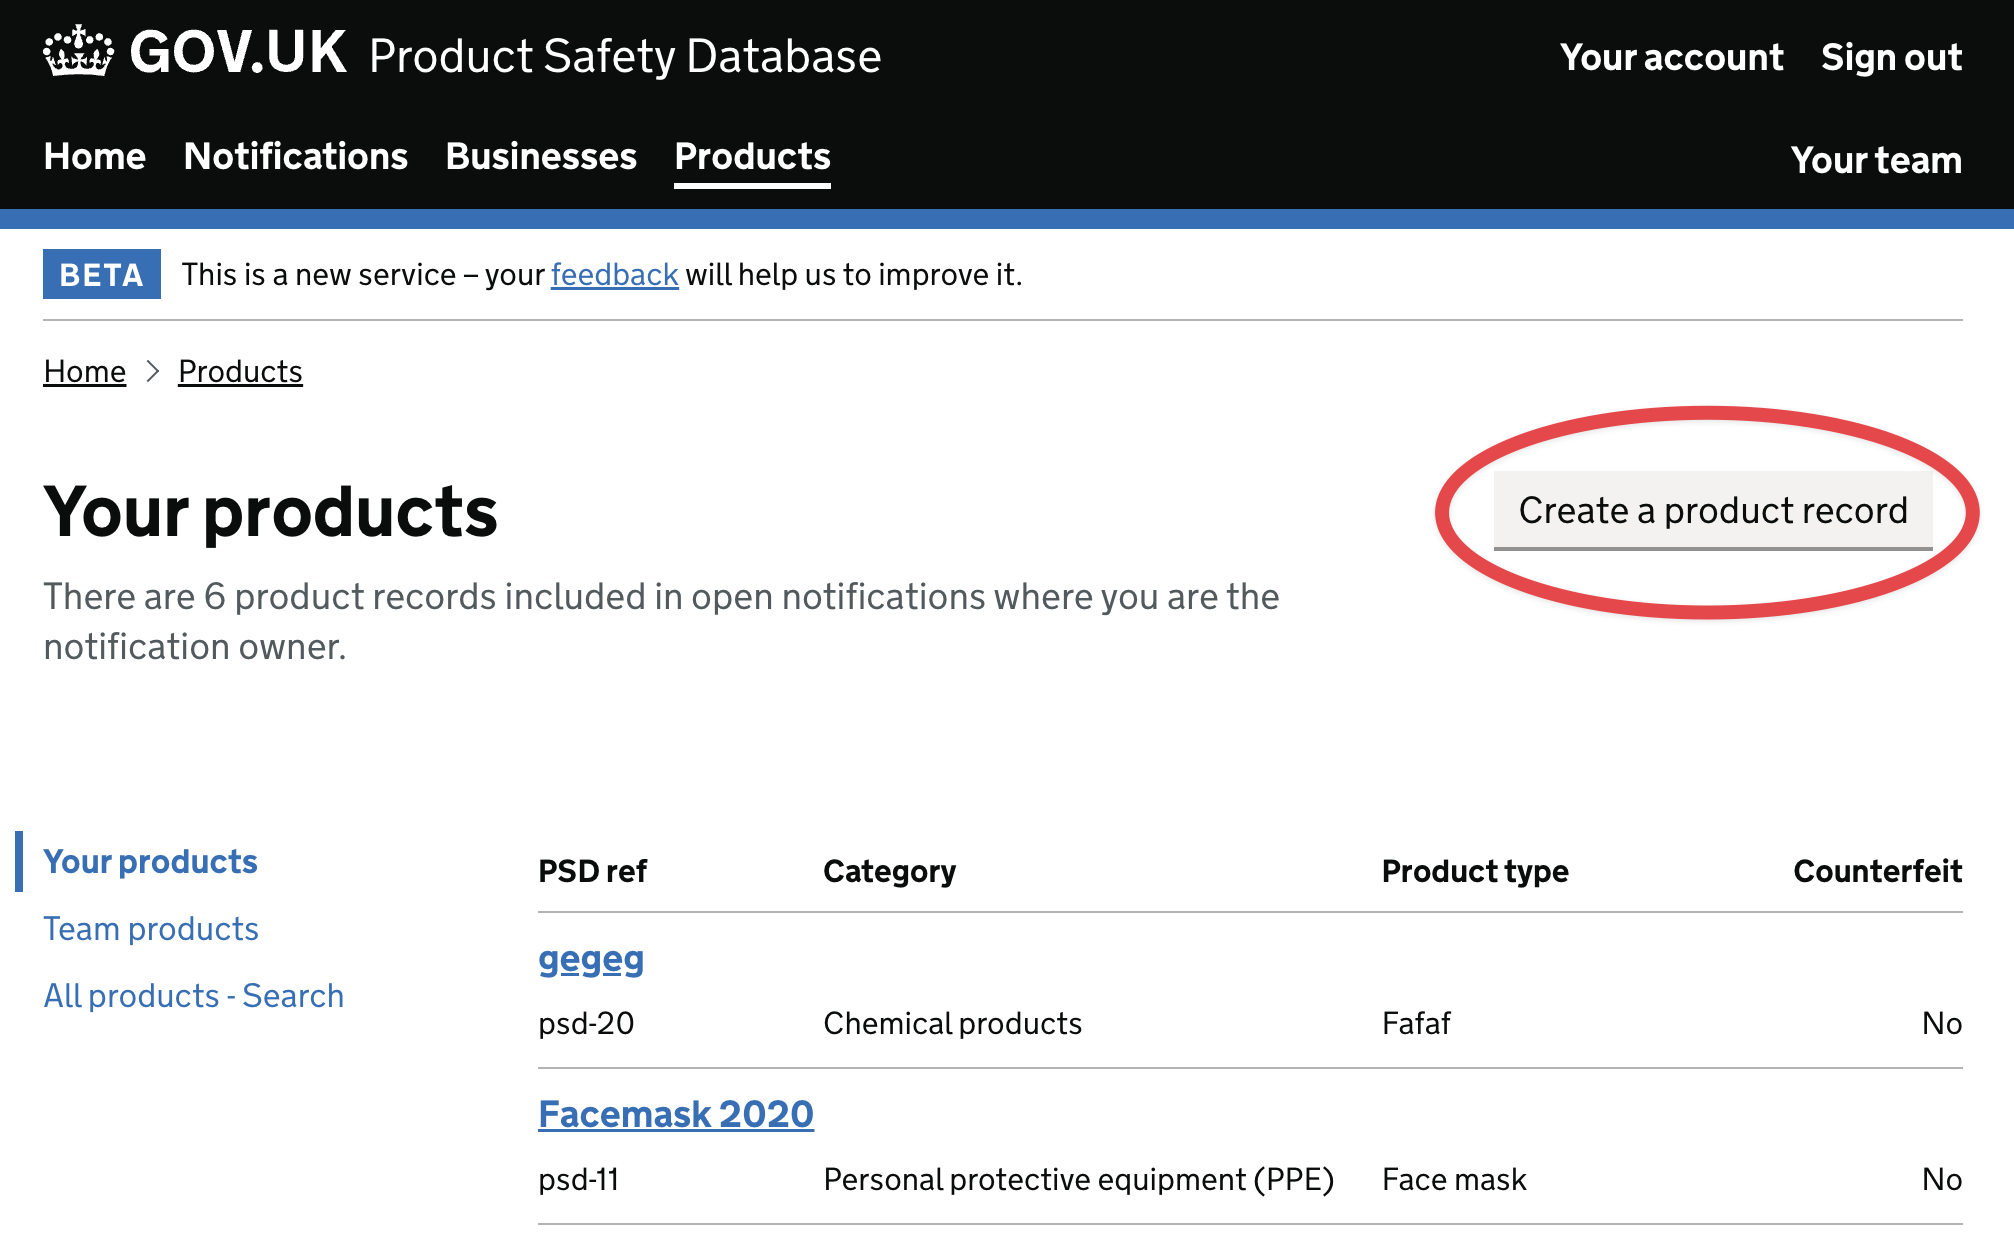
When you have finished the process of creating a product record, it can be found by using the 'All products - Search' page. When it is included in one of your own notifications or one of your team's notifications, it will also appear in the 'Your products' or 'Team products' pages.
When you create a product record, your team has exclusive editing permission and owns the product record.
8. Find a product record
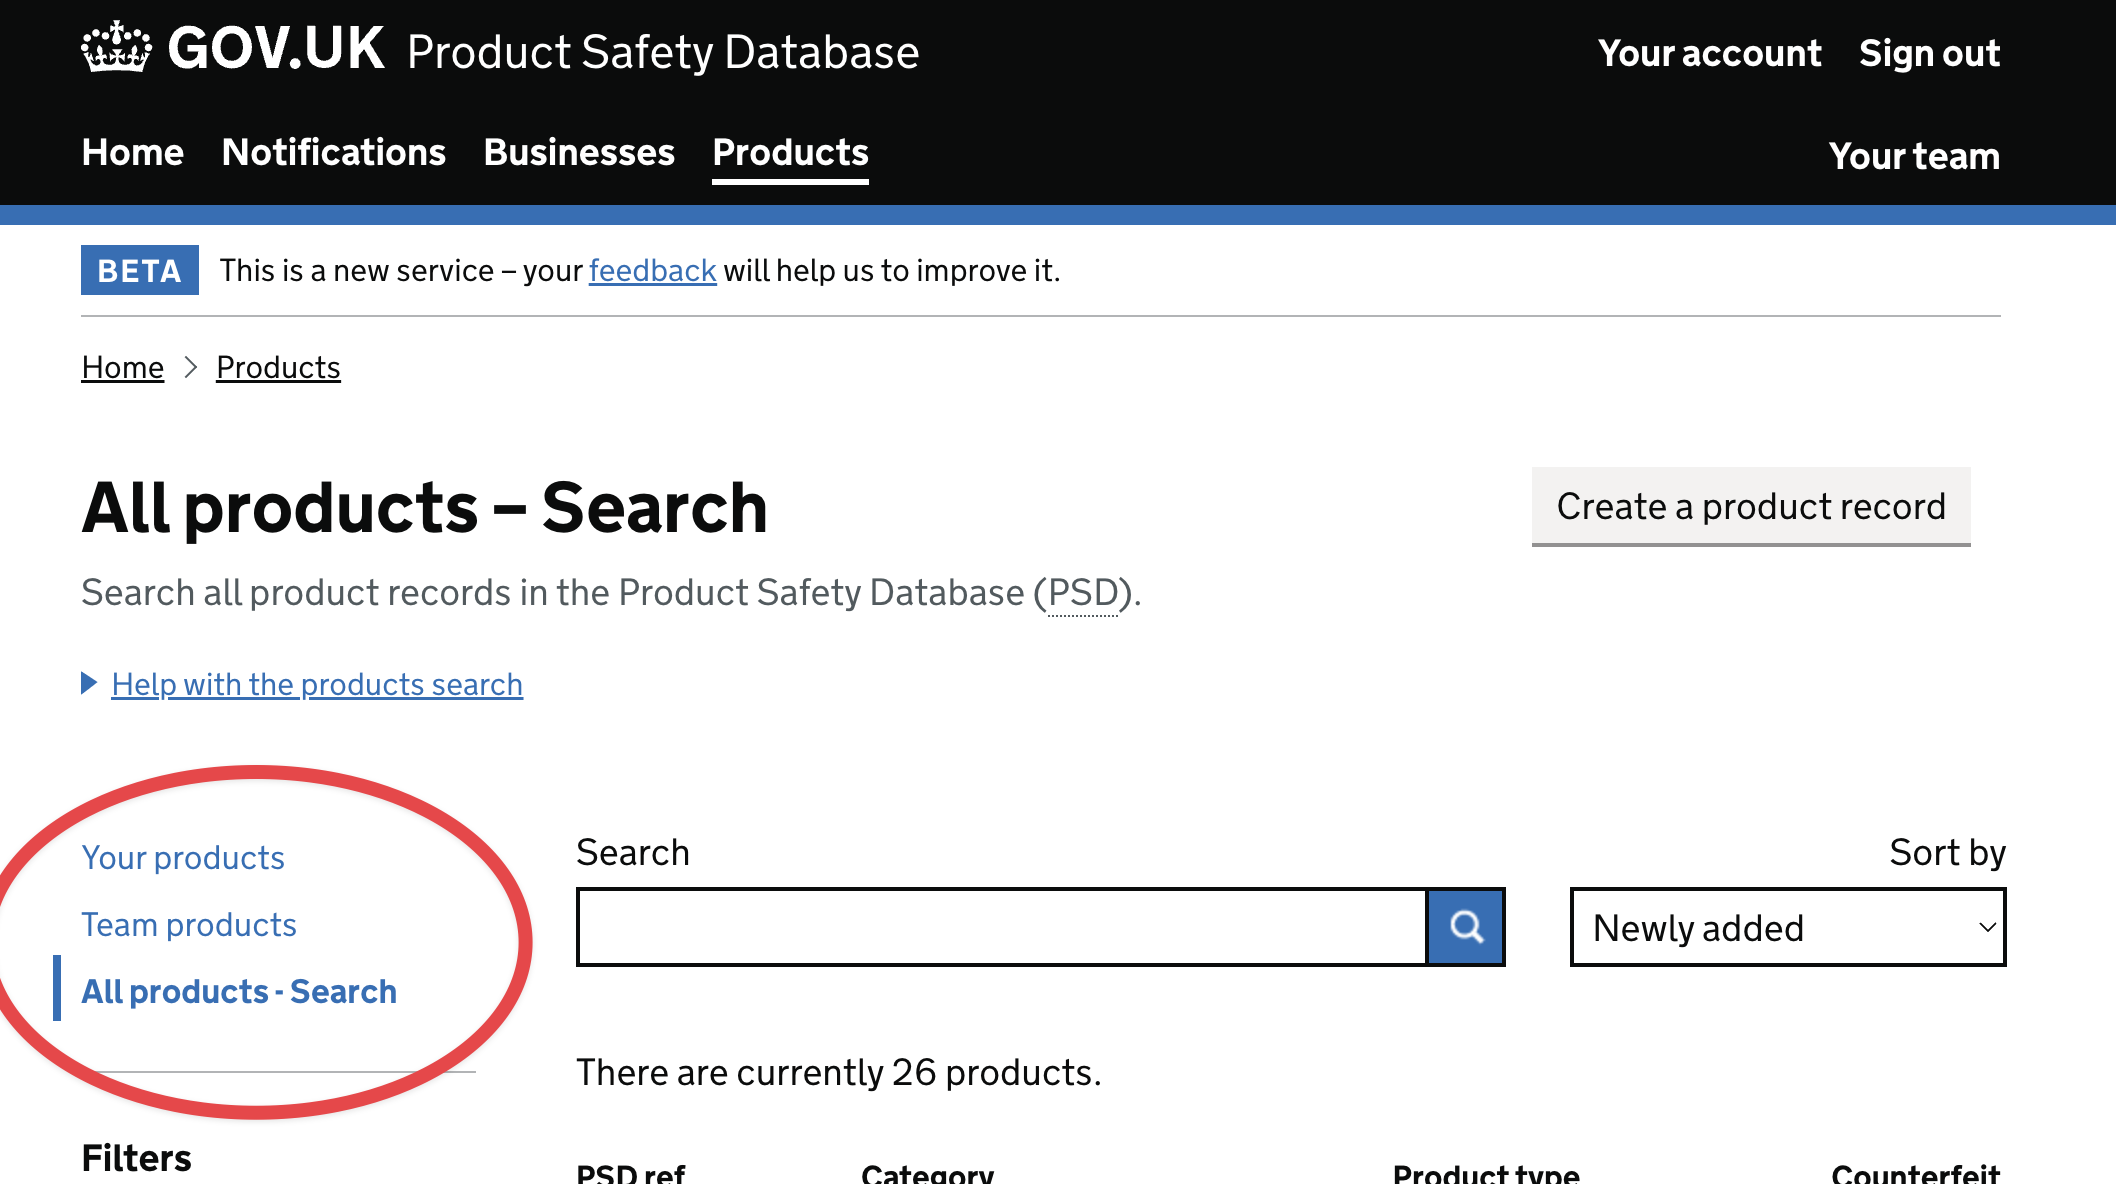
In the products area, the secondary navigation menu (on the left) provides three ways to find a product record:
- 'Your products' lists all the product records included in your open notifications
- 'Team products' lists all the product records included in your team's open notifications
- 'All notifications - Search' is where you can search all product records currently available in the PSD
You can also search for notifications by using the product record details using the 'All notifications - Search' page in the notifications area. This can return all the notifications which include, or have included, the product record; even if the original product record is no longer available.
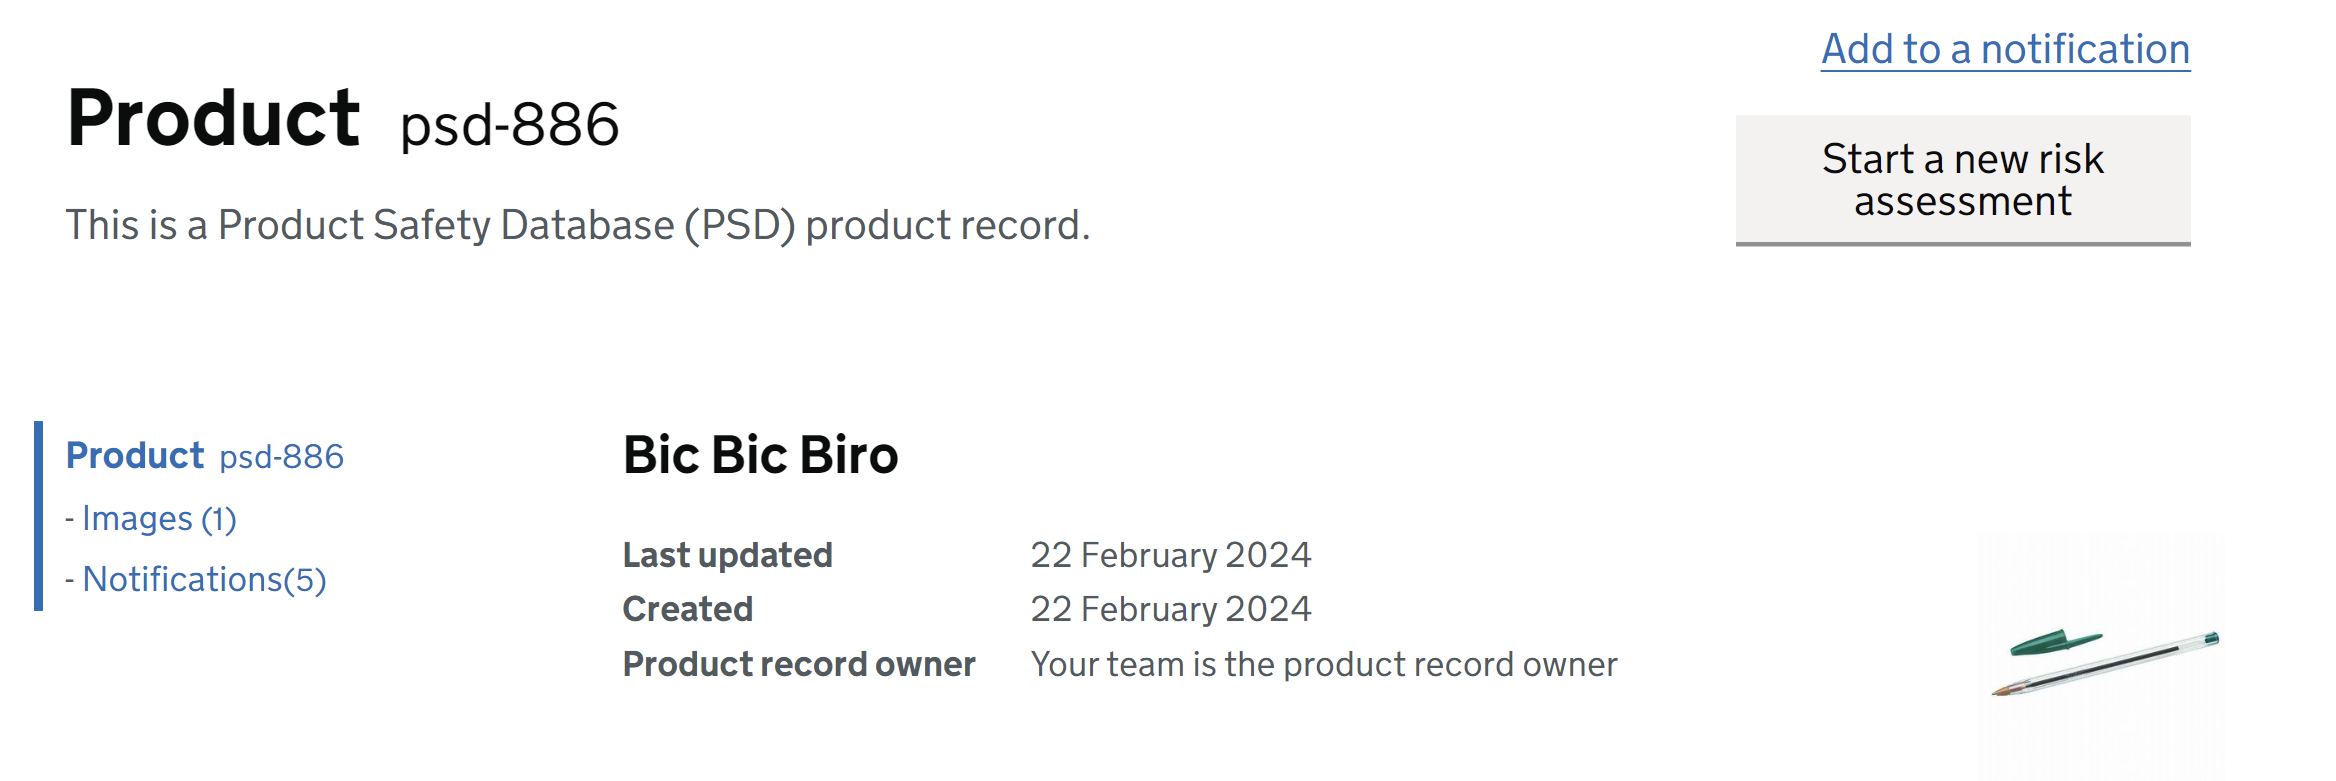
9. Viewing product record information
When you view a product record the secondary navigation menu (on the left) presents the product information in logical groups.
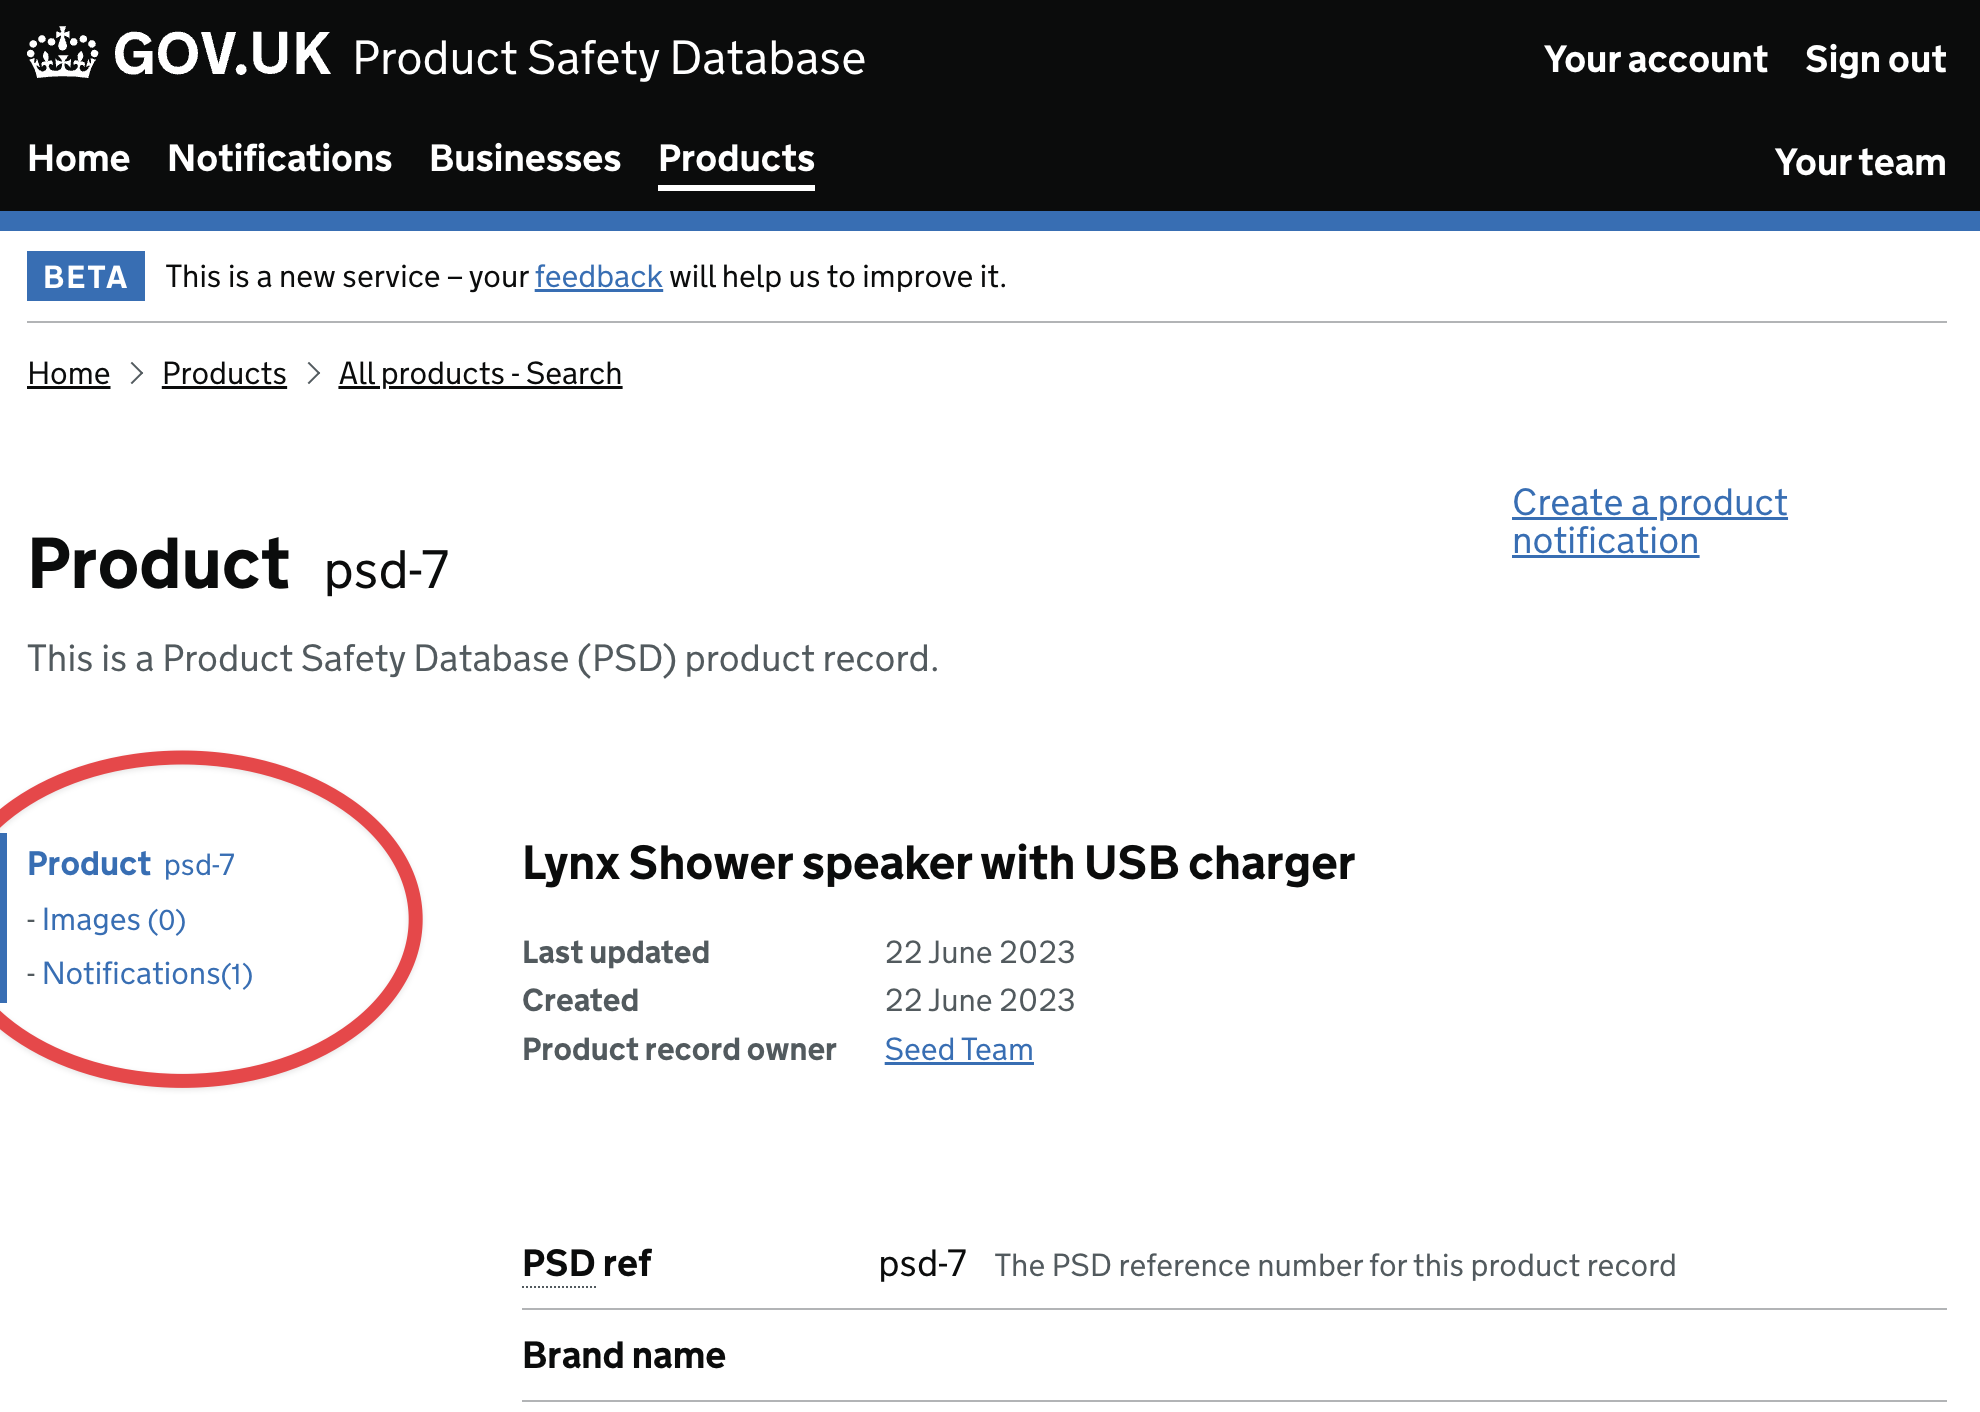
The images added to a product record are images of the product and its packaging and are not notification evidence images (which are added to notifications).
The notifications section of a product record lists all the notifications which have included the product record.
Which team currently owns and has editing permission for the product record is also displayed. Any team can still include the product record within their own notification.
10. Edit a product record
Only one team has editing permission for a product record at any one time. This is to avoid conflicting edits which may compromise the product record.
If you have editing permission, either:
- In the products area, select the 'Edit this product record' option on a product record page
- In the notifications area, select the 'Edit this product' option (associated with the product) on the products page of an individual notification
Then make edits and changes in the form provided (and save your changes).
Some information in a product record - such as the product name - is permanent. This is to avoid product records changing beyond recognition and compromising any notifications which include it. If the changes you require are significantly different then this may necessitate creating a new product record. (You should avoid editing a product record in order for it to represent a different product).
You can also add and remove product records from your notifications.
If you have additional information about a product or more product images, you can source the contact details for the team which currently owns the product record from a product record page.
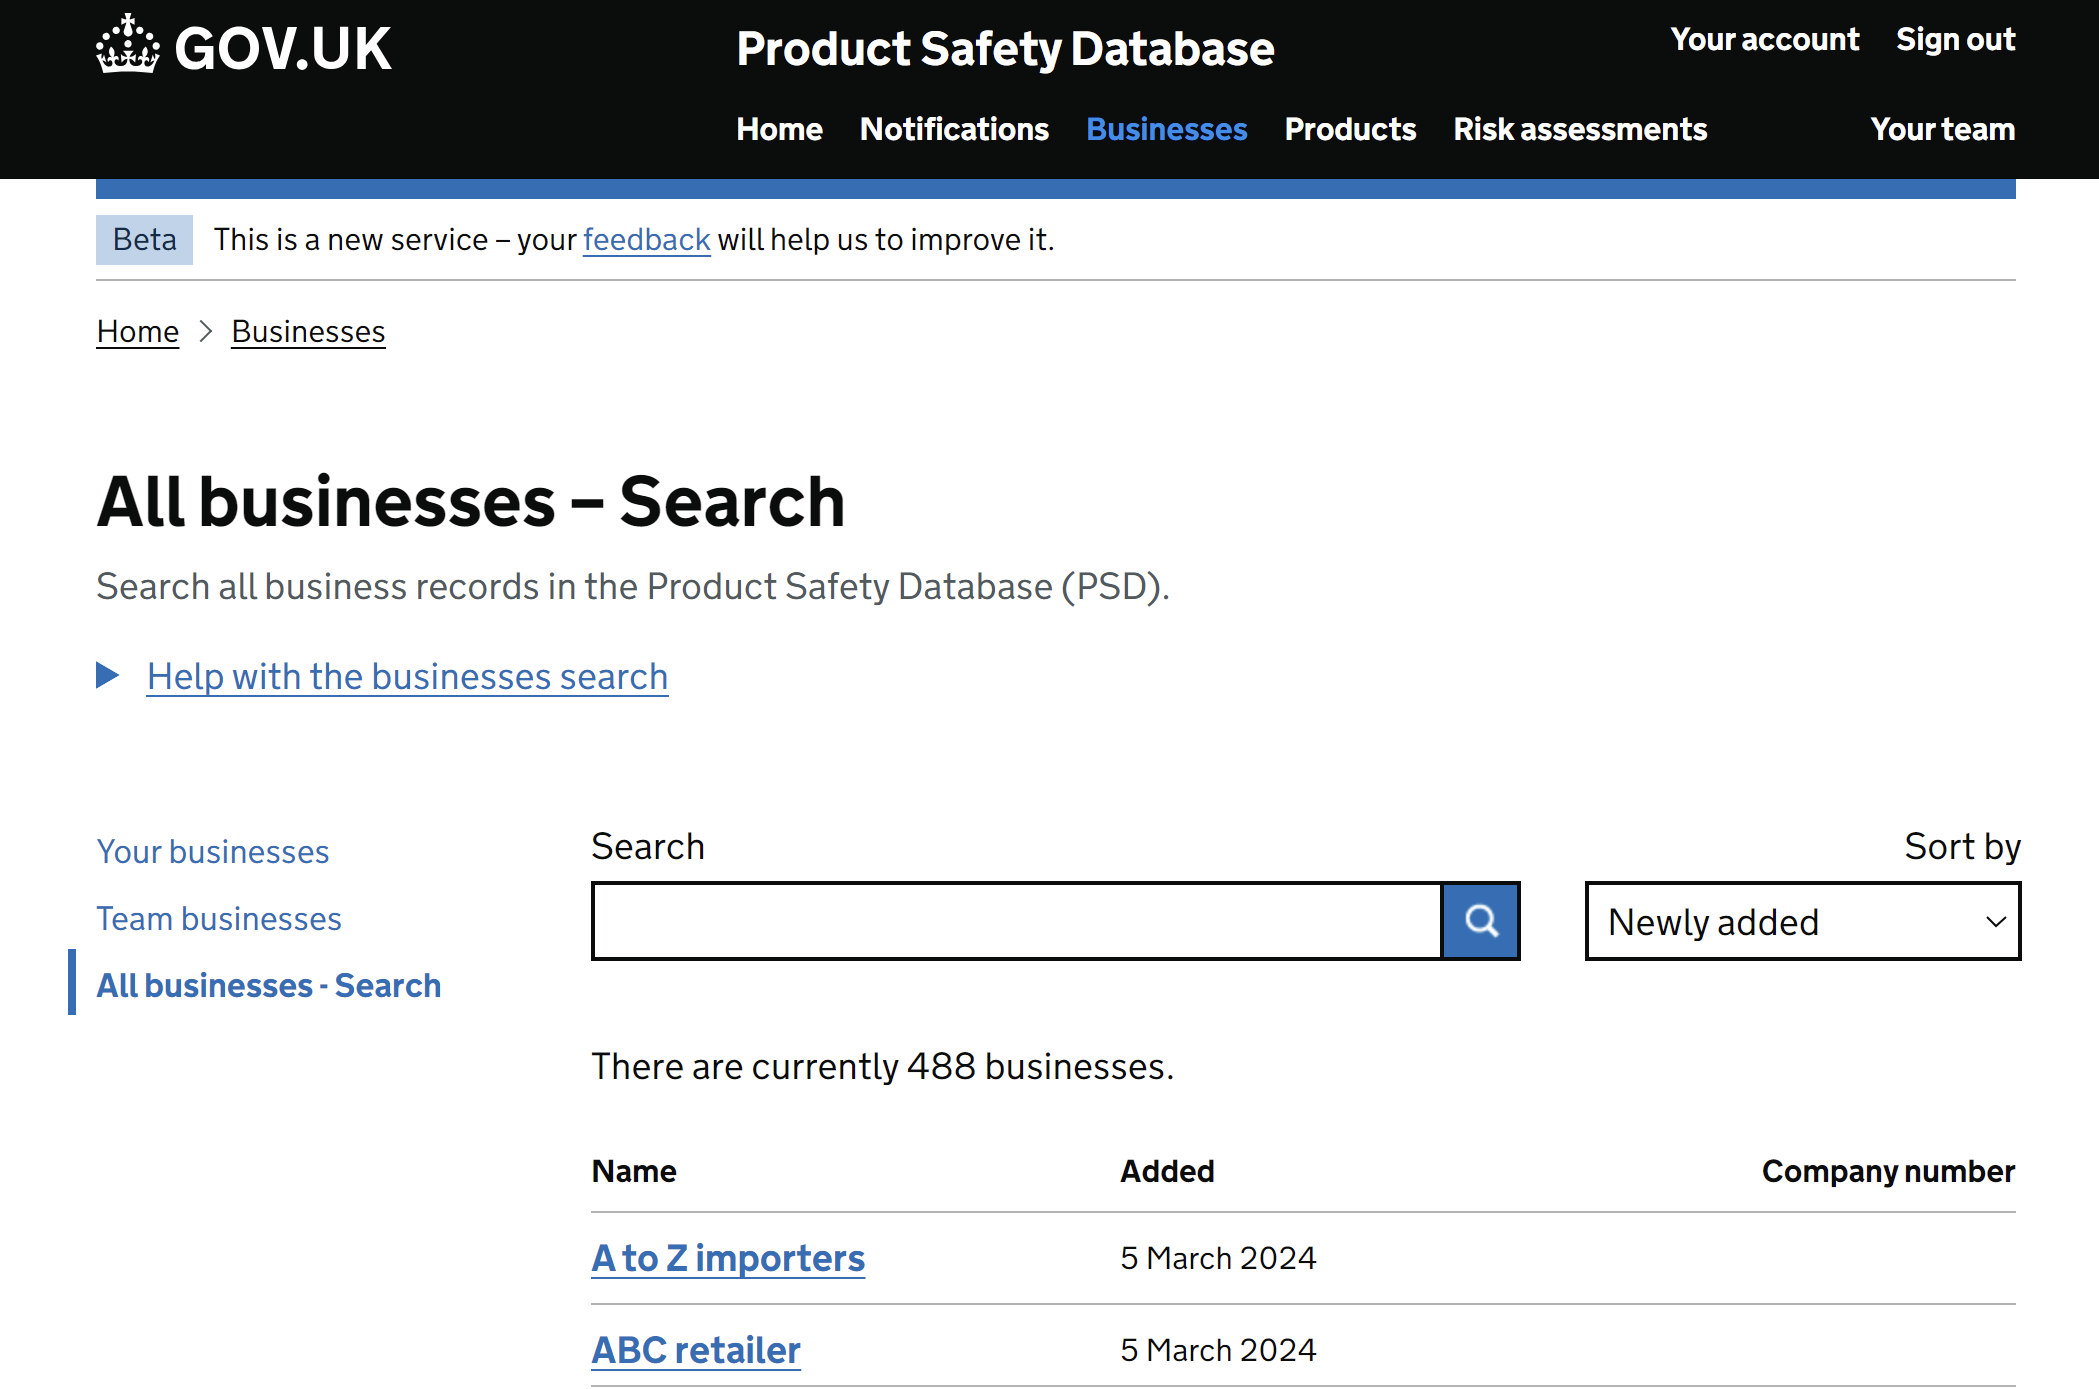
11. Find a business record
In the business area, the secondary navigation menu (on the left) provides three ways to find a product record:
- 'Your businesses' lists all the business records included in your notifications
- 'Team businesses' lists all the business records included in your team's notifications
- 'All businesses – Search' is where you can search all business records in the PSD
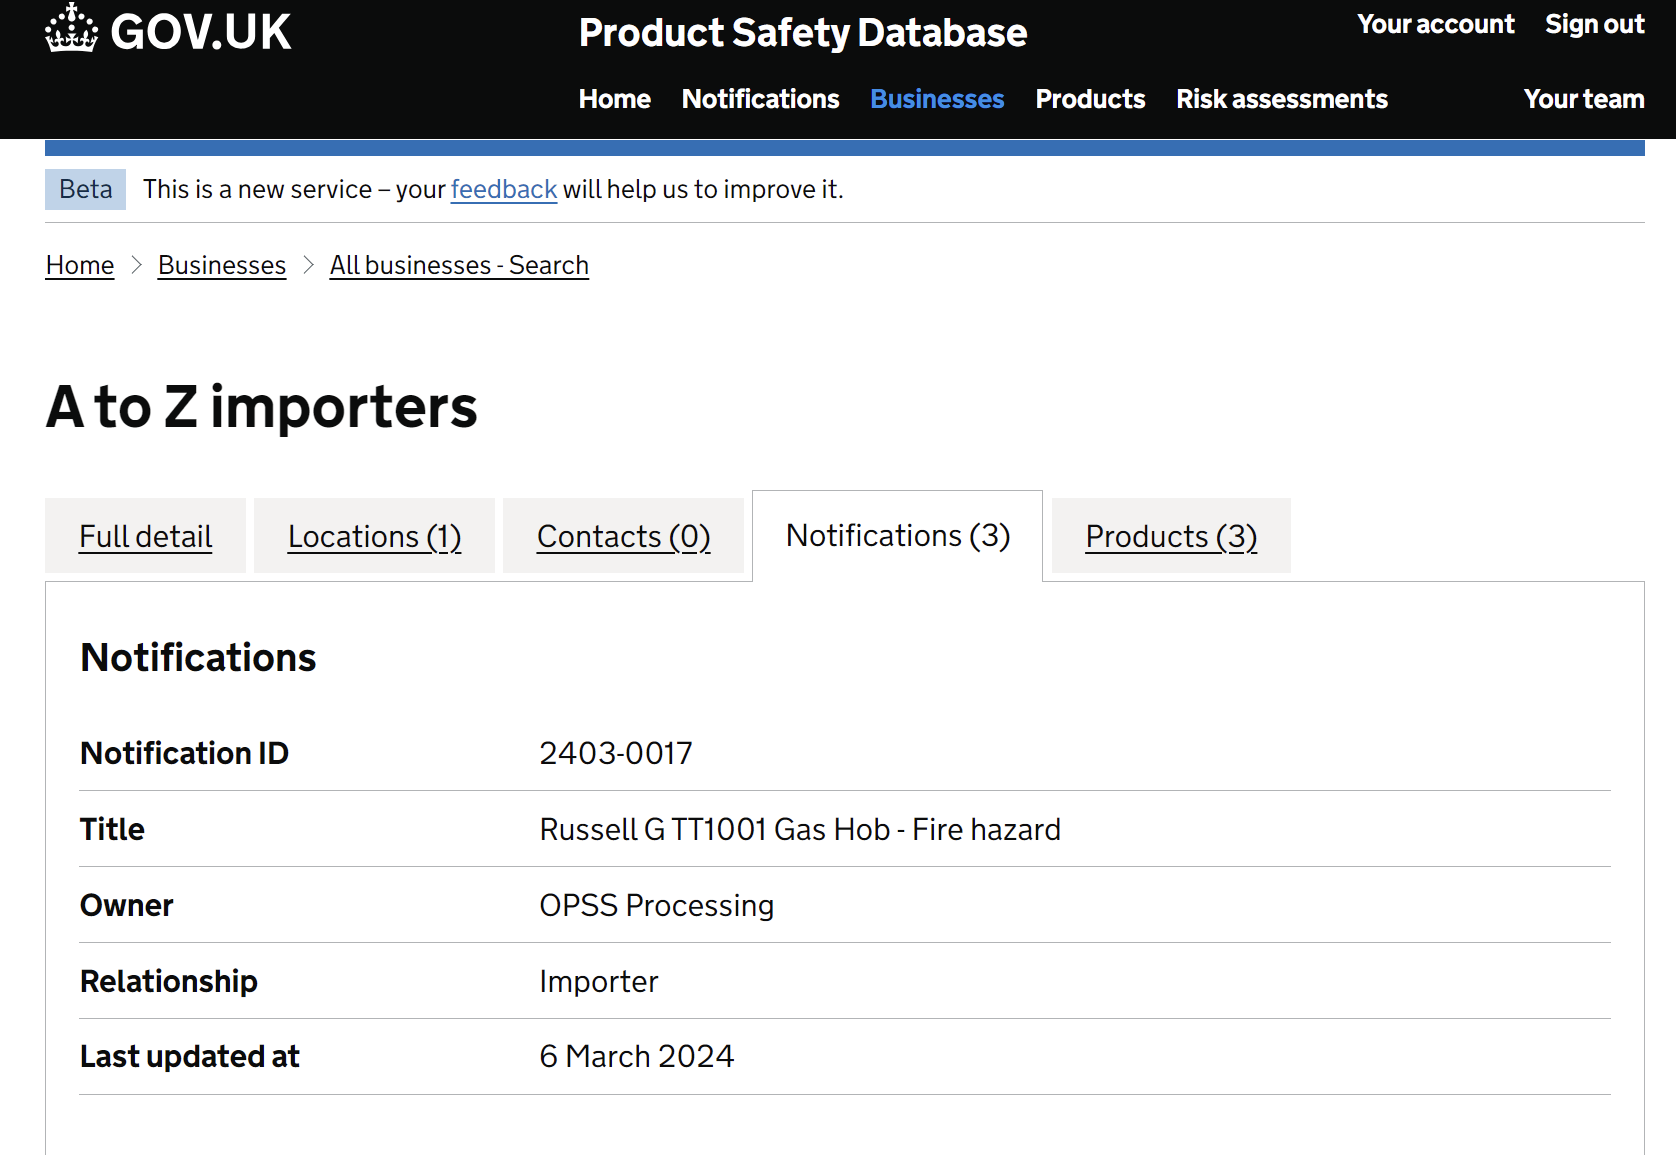
12. Viewing business record information
Moving through to a business record allows you to view:
- Business details
- Associated addresses
- Associated contacts
- Notifications the business has been added to and their supply chain role in each notification
- Products that have been added to the notifications
Tabs allow you to navigate between the information.
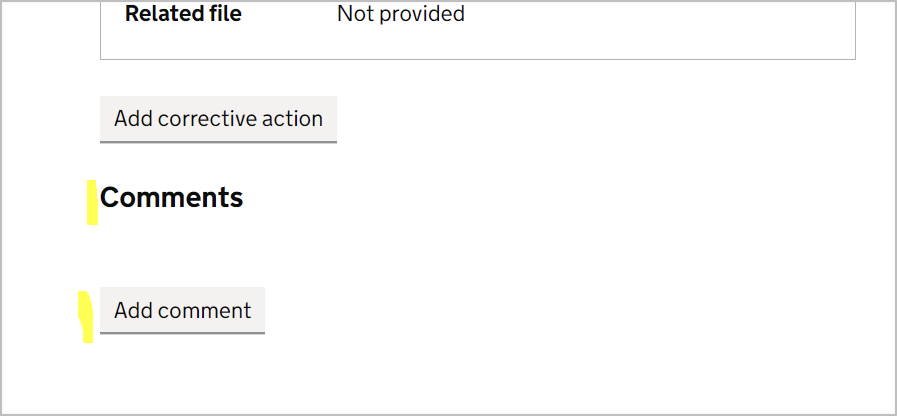
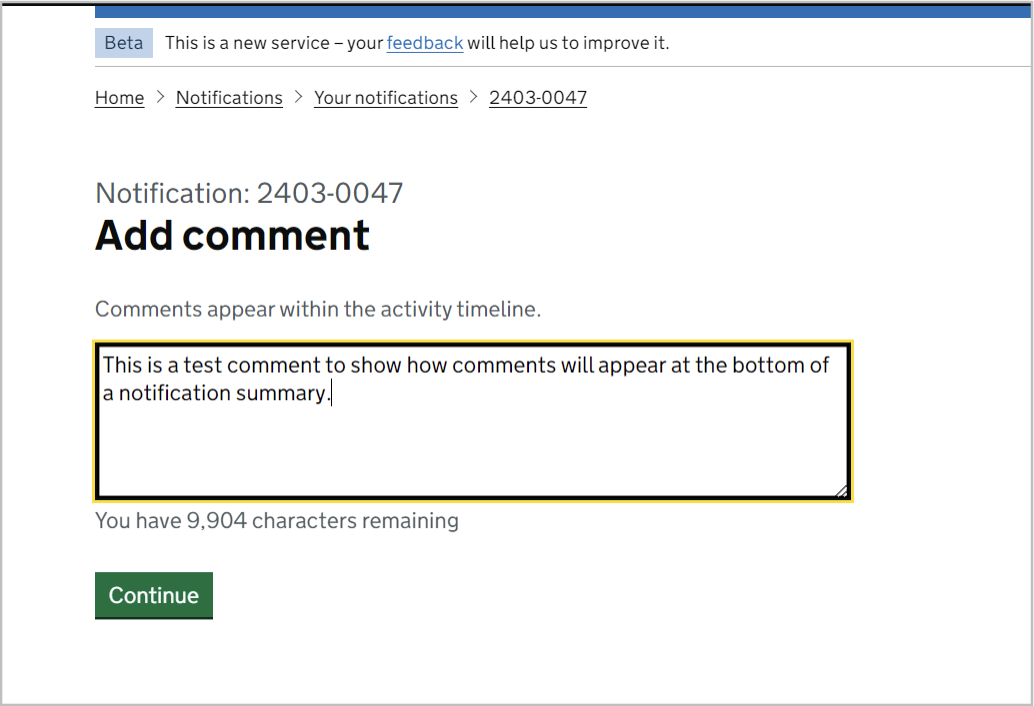
13. Adding comments to a notification
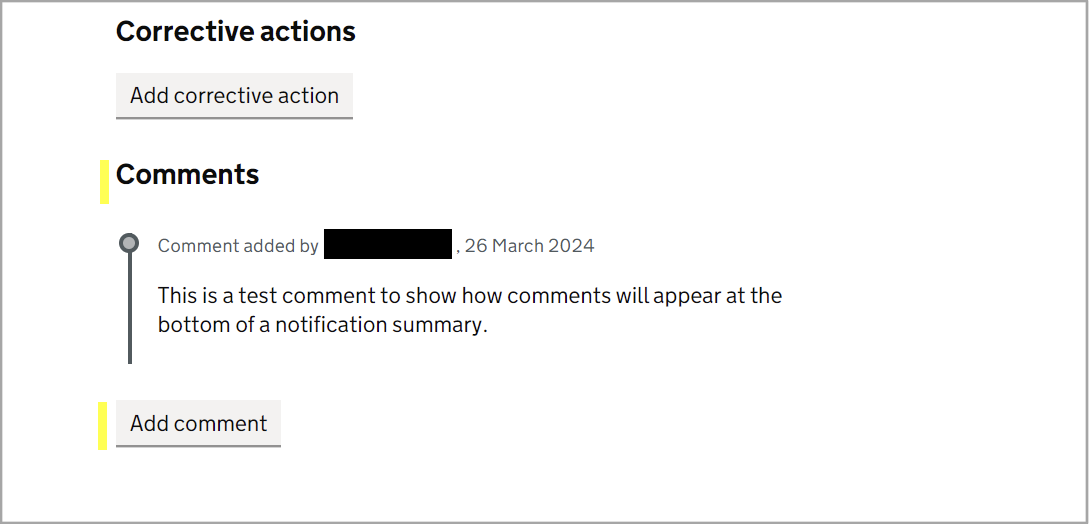
Once a user has submitted a notification, extra context can be added to a notification via the 'add comment' function at the bottom of the notification summary.
Any previous comments added to a notification will also appear here.